
- Halloween Treat Box
- August 27 Card Class open for registration
Spooky Night Box made with Gift Bag Punch
Today I created a couple of treat boxes for Halloween using the Spooky Night Designer Series Paper and Basic Black cardstock. These cute boxes are actually rather large and all one piece. They hold a couple of the new treat tubes, or a small package of sweets and are perfect for the visiting trick or treaters. I love that these are a single piece of cardstock, including the lid. The lid simply flips up.

The base box is Basic Black and covered with Spooky Night Designer Series Paper which becomes available in the Holiday catalog on September 1. The striped banner paper is another pattern from Spooky Nights.
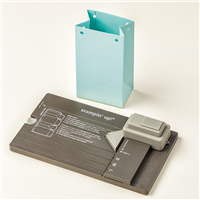
I began with an 11-3/8" X 6-3/8" piece of Basic Black card stock. Using the Simply Scored Scoring tool, score along the long side at 1-3/8, 3-3/8, 6-3/8 and 8-3/8. Turn the Basic Black card stock and score on the short side at 1-3/8" and 5"

Switching to the Gift Bag Punch Board, along the long edge, line up the 1-3/8" score line with the score guide on the punch and punch. Move to the next score line (3-3/8") and align with the score guide and punch. Move to the third score line (6-3/8) and punch. Line up the longest edge with the punch guide and punch again, giving all edges rounded corners.
Now, flip the Basic Black piece over and beginning again with the 1-3/8" edge, align with the punch guide with the score line and punch on the four score lines again -- 1/3/8", 3-3/8", 6-3/8" and 8-3/8". Line up the outer edge as well, and punch causing rounded corners on all edges.
The dimensions for the designer series pieces:
3-1/4" x 2-3/4" - for front of box
3-1/4" X 1-3/4" - for top of box
Watch the direction of your prints or stripes
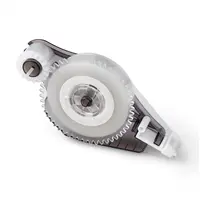
Use Fast Fuse to hold your box together.
The banner-tag:
Very Vanilla - 2 X 5".
Stripe from Spooky Night - 1-3/4" X 4-7/8"
Use Fast Fuse to adhere the banner - tag. Only glue it to the box cover so it flips up when the box cover flips up. I tied a double bow with the Shimmer Ribbon in 3/8" Basic Black and then glued the ends of the ribbon under the lid.

Add a Basic Black cat punched with the Cat Punch. Add the cat with two dimensionals attached to the tag -- not the base of the box -- so the cat also flips up when the cover is removed. The box is fairly busy so I didn't add a sentiment, but you could easily add the Treat or Treat sentiment from he Spooky Night stamp set.
Be sure to add the Cat Punch to your first order from the Holiday catalog, as its sure to be very popular. The cat punch and the coordinating Spooky Cat stamp set will be available as a bundle saving you 10% when purchased together. Add a package of the Spooky Night Designer Series papers so you'll be set for Halloween projects.
Today I created a couple of treat boxes for Halloween using the Spooky Night Designer Series Paper and Basic Black cardstock. These cute boxes are actually rather large and all one piece. They hold a couple of the new treat tubes, or a small package of sweets and are perfect for the visiting trick or treaters. I love that these are a single piece of cardstock, including the lid. The lid simply flips up.

The base box is Basic Black and covered with Spooky Night Designer Series Paper which becomes available in the Holiday catalog on September 1. The striped banner paper is another pattern from Spooky Nights.
I began with an 11-3/8" X 6-3/8" piece of Basic Black card stock. Using the Simply Scored Scoring tool, score along the long side at 1-3/8, 3-3/8, 6-3/8 and 8-3/8. Turn the Basic Black card stock and score on the short side at 1-3/8" and 5"

Switching to the Gift Bag Punch Board, along the long edge, line up the 1-3/8" score line with the score guide on the punch and punch. Move to the next score line (3-3/8") and align with the score guide and punch. Move to the third score line (6-3/8) and punch. Line up the longest edge with the punch guide and punch again, giving all edges rounded corners.
Now, flip the Basic Black piece over and beginning again with the 1-3/8" edge, align with the punch guide with the score line and punch on the four score lines again -- 1/3/8", 3-3/8", 6-3/8" and 8-3/8". Line up the outer edge as well, and punch causing rounded corners on all edges.
The dimensions for the designer series pieces:
3-1/4" x 2-3/4" - for front of box
3-1/4" X 1-3/4" - for top of box
Watch the direction of your prints or stripes
Use Fast Fuse to hold your box together.
The banner-tag:
Very Vanilla - 2 X 5".
Stripe from Spooky Night - 1-3/4" X 4-7/8"
Use Fast Fuse to adhere the banner - tag. Only glue it to the box cover so it flips up when the box cover flips up. I tied a double bow with the Shimmer Ribbon in 3/8" Basic Black and then glued the ends of the ribbon under the lid.

Add a Basic Black cat punched with the Cat Punch. Add the cat with two dimensionals attached to the tag -- not the base of the box -- so the cat also flips up when the cover is removed. The box is fairly busy so I didn't add a sentiment, but you could easily add the Treat or Treat sentiment from he Spooky Night stamp set.
Be sure to add the Cat Punch to your first order from the Holiday catalog, as its sure to be very popular. The cat punch and the coordinating Spooky Cat stamp set will be available as a bundle saving you 10% when purchased together. Add a package of the Spooky Night Designer Series papers so you'll be set for Halloween projects.
Recipe for card:
Recipe for card:
Stamps: None
Ink: None
Paper: Basic Black, Very Vanilla, Spooky Night Designer Series Paper
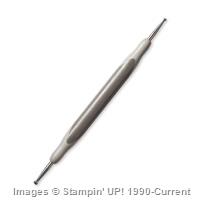
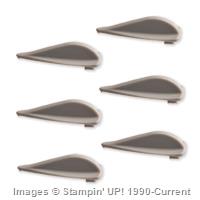
Accessories: 3/8" 'Basic Black Shimmer Ribbon, Fast Fuse, Simply Scored Scoring Tool, Gift Bag Punch Board, Paper Snips, Bone Folder, Stampin' Trimmer, Dimensionals,
Stamps: None
Ink: None
Paper: Basic Black, Very Vanilla, Spooky Night Designer Series Paper
Accessories: 3/8" 'Basic Black Shimmer Ribbon, Fast Fuse, Simply Scored Scoring Tool, Gift Bag Punch Board, Paper Snips, Bone Folder, Stampin' Trimmer, Dimensionals,
Ink: None
Paper: Basic Black, Very Vanilla, Spooky Night Designer Series Paper
Accessories: 3/8" 'Basic Black Shimmer Ribbon, Fast Fuse, Simply Scored Scoring Tool, Gift Bag Punch Board, Paper Snips, Bone Folder, Stampin' Trimmer, Dimensionals,
Click on an image below to see larger product images and to go directly to my Stampin' Up! store to find out more about each product. Some items, like the Clear Tiny Treat Boxes, are available now. However, items from the Holiday Catalog, will not show until they can be ordered on September 1.
Click on an image below to see larger product images and to go directly to my Stampin' Up! store to find out more about each product. Some items, like the Clear Tiny Treat Boxes, are available now. However, items from the Holiday Catalog, will not show until they can be ordered on September 1.


Sign up for the August 27 Card Class
In the Aug 27 class where we'll make the 8 cards pictured below. We'll make holiday cards and all-occasion cards as we move into back-to-school and the upcoming holiday season. You'll play with new stamps, punches and die cuts and try some of the Holiday sets, including the Carols of Christmas set, which is an early release set you can purchase this month before the Stampin' Up! Holiday catalog is released September 1.

In the Aug 27 class where we'll make the 8 cards pictured below. We'll make holiday cards and all-occasion cards as we move into back-to-school and the upcoming holiday season. You'll play with new stamps, punches and die cuts and try some of the Holiday sets, including the Carols of Christmas set, which is an early release set you can purchase this month before the Stampin' Up! Holiday catalog is released September 1.

Take a closer look at the projects we'll make in the Meetup Photo album for this class, and register for the class while you're vising my Meetup site. The photo album includes individual photos of each card we'll make.
Place an on-line order through my Stampin' Up! store - 24/7 Shopping
Sign up to stay up-to-date with new card ideas by subscribing to my blog, register on my Meetup site or follow me on Instagram.
Place an on-line order through my Stampin' Up! store - 24/7 Shopping
Sign up to stay up-to-date with new card ideas by subscribing to my blog, register on my Meetup site or follow me on Instagram.
Quick Links
- Download a free copy of the 2017-2018 Annual Catalog
- Order at a discount as a Stampin' Up! demonstrator. Sign up for $99 and get $125 worth of products in your starter kit that you select, and $72 worth of starter essentials. Your kit ships free and you'll receive a free Paper Pumpkin kit as part of your new demonstrator kit. After you sign up, enjoy your future purchases at demonstrator discount prices of 20% to 25% off.
- Clearance Rack items - while quantities last.
- Order current or previous Paper Pumpkin monthly craft kits.
Enjoy!
Stampin' Up! Independent Demonstrator
To place an order: Place an on-line order through my Stampin' Up! store - 24/7 Shopping

No comments:
Post a Comment