- Decorate 2" clear treat boxes with delicate flowers
- 2" X 2" X 2" Clear Treat boxes idea
- Sign Up. Get 10 Free Stamp Pads
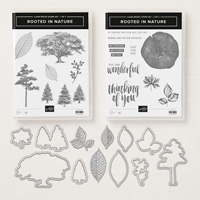
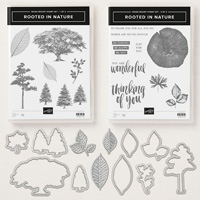
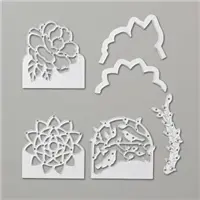
Stampin' Up! Botanical Tag Thinlit
I still had the Stampin' Up! Botanical Tag Thinlit on my work desk from the card I posted last week, so I decided to make a treat holder project with this thinlit and the 2" X 2" X 2" clear treat boxes. I happened to have some Dove Dark Chocolate & Sea Salt Caramels covered in a foil that matched our Coastal Cabana cardstock, so I used this as an opportunity to break open (and sample) these wonderful chocolates!!

The 2" X 2" X 2" Clear Tiny Treat Boxes are shipped flat, and easily fold together. To ensure each box arrives scratch-free, there is a thin film that you'll want to remove when you assemble the boxes.
Then I cut and scored a 8-1/2" X 2" strip of Coastal Cabana cardstock. The scoring dimensions are listed in the recipe below, and I used the Simply Scored Scoring Tool to easily score my cardstock.

After scoring the Coastal Cabana cardstock, I realized that it might be difficult to adhere the detailed die cut to the clear acetate box without getting glue everywhere, so I grabbed a sheet of Multipurpose Adhesive Sheets and cut an 8-1/2 X 2" strip and removed the backing to adhere it to the Coastal Cabana cardstock. I creased the score maks with a bone folder to ensure the cardstock and backing would adhere to the tiny treat box once cut.
I then die cut the Botanical Tag shape into each 2" section of the 8-1/2" X 2" strip. I essentially die cut the 8-1/2" strip 4 times. The die size is a perfect fit for these 2" sections.

Then remove the Multipurpose Adhesive Sheet backing and adhere the die cut to the four sides of the acetate treat boxes. The image below shows one treat box with only the die cut, while the second box is filled with candies and the top is decorated with bows and leafy die cuts.

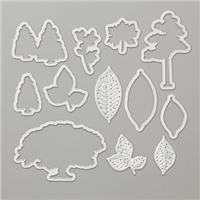
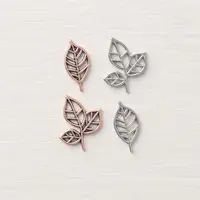
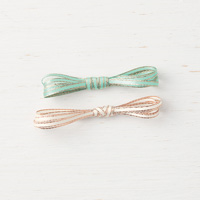
The bow was created with the 5/8" Polka Dot Tulle layered over a retired Pool Party ribbon. My Coastal Cabana ribbon from the Tea Room Ribbon Combo Pack arrives Wednesday, so I'll finish decorating the 2nd treat box one that ribbon arrives. In addition to the bow, I used the leafy die that is one of the dies in the Botanical Tags Thinlit set, shown below, and die cut two leafy pieces that I added to ribbon on the top of the decorated treat box. I also chose to add the ribbon onto the top of the treat box with glue dots instead of wrapping the ribbon around the full box so that the box can be opened without untying the ribbon. Also I didn't want the ribbon to cover any of the flower die cuts.

The Botanical Tag Thinlit includes three different tag tops or images that you'll find useful for cards, scrapbook accents, or treat bags and boxes. I can't wait to find more ways to use this set of thinlits!!
Recipe:
Coastal Cabana: 8-1/2" X 2"
Scored on Long side at 2-1/16", 4-1/8", 6-1/8, 8-3/16"
Accessories: Botanical Tag Thinlit, 2" X 2" X 2" Clear Tiny Treat Box, 5/8" Polka Dot Tulle Ribbon, Coastal Cabana/copper ribbon from the Tea Room Ribbon Combo Pack, Multipurpose Adhesive Sheets, Big Shot, Big Shot Platform, Standard Cutting Pads Paper Snips, Bone Folder, Simply Scored Scoring Tool, Stampin' Trimmer, Multipurpose Glue, Mini Dimensionals
I still had the Stampin' Up! Botanical Tag Thinlit on my work desk from the card I posted last week, so I decided to make a treat holder project with this thinlit and the 2" X 2" X 2" clear treat boxes. I happened to have some Dove Dark Chocolate & Sea Salt Caramels covered in a foil that matched our Coastal Cabana cardstock, so I used this as an opportunity to break open (and sample) these wonderful chocolates!!

The 2" X 2" X 2" Clear Tiny Treat Boxes are shipped flat, and easily fold together. To ensure each box arrives scratch-free, there is a thin film that you'll want to remove when you assemble the boxes.
Then I cut and scored a 8-1/2" X 2" strip of Coastal Cabana cardstock. The scoring dimensions are listed in the recipe below, and I used the Simply Scored Scoring Tool to easily score my cardstock.

After scoring the Coastal Cabana cardstock, I realized that it might be difficult to adhere the detailed die cut to the clear acetate box without getting glue everywhere, so I grabbed a sheet of Multipurpose Adhesive Sheets and cut an 8-1/2 X 2" strip and removed the backing to adhere it to the Coastal Cabana cardstock. I creased the score maks with a bone folder to ensure the cardstock and backing would adhere to the tiny treat box once cut.
I then die cut the Botanical Tag shape into each 2" section of the 8-1/2" X 2" strip. I essentially die cut the 8-1/2" strip 4 times. The die size is a perfect fit for these 2" sections.

Then remove the Multipurpose Adhesive Sheet backing and adhere the die cut to the four sides of the acetate treat boxes. The image below shows one treat box with only the die cut, while the second box is filled with candies and the top is decorated with bows and leafy die cuts.

The bow was created with the 5/8" Polka Dot Tulle layered over a retired Pool Party ribbon. My Coastal Cabana ribbon from the Tea Room Ribbon Combo Pack arrives Wednesday, so I'll finish decorating the 2nd treat box one that ribbon arrives. In addition to the bow, I used the leafy die that is one of the dies in the Botanical Tags Thinlit set, shown below, and die cut two leafy pieces that I added to ribbon on the top of the decorated treat box. I also chose to add the ribbon onto the top of the treat box with glue dots instead of wrapping the ribbon around the full box so that the box can be opened without untying the ribbon. Also I didn't want the ribbon to cover any of the flower die cuts.

The Botanical Tag Thinlit includes three different tag tops or images that you'll find useful for cards, scrapbook accents, or treat bags and boxes. I can't wait to find more ways to use this set of thinlits!!
Recipe:
Coastal Cabana: 8-1/2" X 2"
Scored on Long side at 2-1/16", 4-1/8", 6-1/8, 8-3/16"
Accessories: Botanical Tag Thinlit, 2" X 2" X 2" Clear Tiny Treat Box, 5/8" Polka Dot Tulle Ribbon, Coastal Cabana/copper ribbon from the Tea Room Ribbon Combo Pack, Multipurpose Adhesive Sheets, Big Shot, Big Shot Platform, Standard Cutting Pads Paper Snips, Bone Folder, Simply Scored Scoring Tool, Stampin' Trimmer, Multipurpose Glue, Mini Dimensionals
Click on the product images below for more information and close ups for any of the supplies used in today's project. Or, go directly to my Stampin' Up! store.
Click on the product images below for more information and close ups for any of the supplies used in today's project. Or, go directly to my Stampin' Up! store.


Stay up-to-date with card ideas, by subscribing to my blog, register on my Meetup site or follow me on Instagram.
Stay up-to-date with card ideas, by subscribing to my blog, register on my Meetup site or follow me on Instagram.
Sign up. Get 10 Free Stamp Pads
Become a demonstrator between July 1-31 with a $99 order, and get $125 in merchandise selected by you from the current catalog, plus 10 free stamp pads in the color family you want most. This enhanced Starter Kit offer is good for both new demonstrators, or if you've been a demonstrator who's dropped and wants to sign up for the discounts again.

Demonstrators earn a 20-25 percent discount on your own hobby supplies as a hobby demonstrator. Or turn your hobby into a business and earn income on what you sell.
This is a great way to earn income working part-time, doing something you love, for a special vacation, or to cover holiday purchases to make your Christmas truly special.
Join my team, get ready for fun, and find out more here. There's no obligation to every host workshops or parties, sell product to others or purchase anything more if you choose to be a hobby demonstrator. Your only obligation is to reach $300 in sales by the end of the first full Stampin' Up! quarter. You can drop with no penalty and sign up again later to continue earning discounts on your purchases.
To Order:
To Order:
1. Orders over $150 (not including tax and shipping), qualify for shopping rewards. You select free merchandise from the current catalogs to add to your order. You can also purchase hostess sets with a $150 order.
2. If the purchases on your Wish List are over $100, the $99 Starter Kit is one way to save on your purchase today. And save even more on future orders. You can order $125 worth of product for your $99 starter kit. After your initial $99 order for merchandise you select from anything in the current catalogs, place an order for the remainder of your Wish List as a demonstrator, and save 20% on your purchases as a demonstrator. Need help building your shopping list? Contact me, and we'll work through your starter kit order together.
3. Place an on-line order through my Stampin' Up! store - 24/7 Shopping. I would love to be your Stampin' Up! demonstrator if you don't already have one. Let me know if you need an Occasions Catalog.
4. Clearance Rack items - while quantities last.
5. Order current or previous Paper Pumpkin monthly craft kits. If you've never tried Paper Pumpkin, you can try it now for $50% off your first month, now.
Enjoy!
Stampin' Up! Independent Demonstrator