
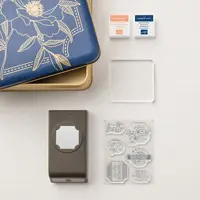
- Stampin' Up! Darling Label Punch Box
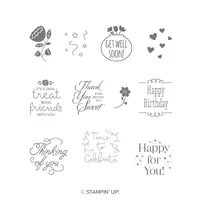
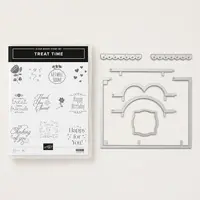
- Stampin' Up! Treat Time Stamp Set
- Treat Box ideas
Stampin' Up! Darling Label Punch Box
I had some time to play with new products from the June 1 annual catalog, and I pulled out one of the fun item, The Darling Label Punch Box. The Label Punch in this tin not only works with the stamp set that's part of the Punch Box, but also works with the Stampin' Up! Treat Time stamp set. The Treat Time stamp set also works with the coordinating Petite Treat Framelits Die, extending the usefulness of all these tools. I was inspired by a project on the ChicnScratch.com site today, and decide to make these cute boxes using the Darling Label Punch and the coordinating stamp sets.

Just a little more about this punch kit: The tin includes not only the punch and a stamp set, but this is the perfect starter kit for a new stamper, as it includes two stampin' ink spots, and a clear stamping block. Just add cardstock. To extend the usefulness of this set, I also purchased the Treat Time stamp set that includes another 7 sentiment stamps and 4 additional images that work with the Darling Label Punch. The Darling Label Punch can only be purchased as part of the kit.

The Darling Label Punch Box Tin includes the punch,
Stamp set, two ink spots and a clear stamp
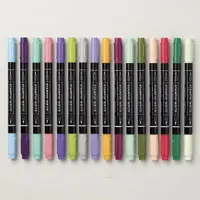
I used the kit and coordinating stamp set to create these cute treat boxes. I used two of the new colors, Coastal Cabana, and Gorgeous Grape. The new catalog includes coordinating papers, ribbons and Stampin' Markers in these new colors.

The treat box I made today, is two pieces that are assembled using Tear & Tape.
Cutting dimensions:
Long piece: 8-1/2" X 3-1/4".
Shorter piece: 4-7/8" X 4-78"
Scoring:
Long 8-1/2" piece: On long side score at 1/2", 3-1/2", 4-1/2", 7-1/2", using the Simple Scored Scoring Tool
Shorter piece: Score at 15/16" on all four sides, using the scoring blade on your trimmers
In the photo below, you can see the positioning of the Tear & Tape on the shorter pieces after scoring and creasing both pieces with a bone folder.

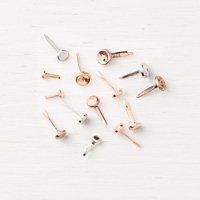
The photo below show how the box is placed on the wrap-around 8-1/2" piece. Pinch in the corners of the box and use more Tear & Tape to hold the corners to the box. To hold the box closed, punch a 1/2" circle and attach it to the font of the box with the one of the new silver brads from the Metallic Brads collection. Use a Paper Piercer to create a hole through the 1/2" circle and the front of the box through the box layers to insert the silver brad.

Decorate the top of the box with patterns from the 6" X 6" Designer Series Paper. Both Coastal Cabana and Gorgeous Grape are included in the Brights 6' X 6" Designer Series Paper stack, along with the additional 8 Brights colors.

The coordinating ribbons are the 1/4" mini Striped Ribbons in Bermuda Bay and Gorgeous Grape, from the new catalog.

Recipe:
Stamp: Darling Label Punch Box, Treat Time
Ink: Gorgeous Grape, Coastal Cabana
Paper: Gorgeous Grape, Coastal Cabana, Thick Whisper White
Accessories: Shaped Stitched Framelits, Layered Square Framelits, Darling Label Punch, Metallic Brads, 1/4" Bermuda Bay Mini Striped Ribbon, 1/4" Gorgeous Grape Ribbon, Simply Scored Scoring Tool, Big Shot, Big Shot Platform, Standard Cutting Pads, Paper Snips, Bone Folder, Stampin' Trimmer, Tear & Tape, Multipurpose Glue, Dimensionals
I had some time to play with new products from the June 1 annual catalog, and I pulled out one of the fun item, The Darling Label Punch Box. The Label Punch in this tin not only works with the stamp set that's part of the Punch Box, but also works with the Stampin' Up! Treat Time stamp set. The Treat Time stamp set also works with the coordinating Petite Treat Framelits Die, extending the usefulness of all these tools. I was inspired by a project on the ChicnScratch.com site today, and decide to make these cute boxes using the Darling Label Punch and the coordinating stamp sets.

Just a little more about this punch kit: The tin includes not only the punch and a stamp set, but this is the perfect starter kit for a new stamper, as it includes two stampin' ink spots, and a clear stamping block. Just add cardstock. To extend the usefulness of this set, I also purchased the Treat Time stamp set that includes another 7 sentiment stamps and 4 additional images that work with the Darling Label Punch. The Darling Label Punch can only be purchased as part of the kit.
 |
| The Darling Label Punch Box Tin includes the punch, Stamp set, two ink spots and a clear stamp |
I used the kit and coordinating stamp set to create these cute treat boxes. I used two of the new colors, Coastal Cabana, and Gorgeous Grape. The new catalog includes coordinating papers, ribbons and Stampin' Markers in these new colors.

The treat box I made today, is two pieces that are assembled using Tear & Tape.
Cutting dimensions:
Long piece: 8-1/2" X 3-1/4".
Shorter piece: 4-7/8" X 4-78"
Scoring:
Long 8-1/2" piece: On long side score at 1/2", 3-1/2", 4-1/2", 7-1/2", using the Simple Scored Scoring Tool
Shorter piece: Score at 15/16" on all four sides, using the scoring blade on your trimmers
In the photo below, you can see the positioning of the Tear & Tape on the shorter pieces after scoring and creasing both pieces with a bone folder.

The photo below show how the box is placed on the wrap-around 8-1/2" piece. Pinch in the corners of the box and use more Tear & Tape to hold the corners to the box. To hold the box closed, punch a 1/2" circle and attach it to the font of the box with the one of the new silver brads from the Metallic Brads collection. Use a Paper Piercer to create a hole through the 1/2" circle and the front of the box through the box layers to insert the silver brad.

Decorate the top of the box with patterns from the 6" X 6" Designer Series Paper. Both Coastal Cabana and Gorgeous Grape are included in the Brights 6' X 6" Designer Series Paper stack, along with the additional 8 Brights colors.

The coordinating ribbons are the 1/4" mini Striped Ribbons in Bermuda Bay and Gorgeous Grape, from the new catalog.

Recipe:
Stamp: Darling Label Punch Box, Treat Time
Ink: Gorgeous Grape, Coastal Cabana
Paper: Gorgeous Grape, Coastal Cabana, Thick Whisper White
Accessories: Shaped Stitched Framelits, Layered Square Framelits, Darling Label Punch, Metallic Brads, 1/4" Bermuda Bay Mini Striped Ribbon, 1/4" Gorgeous Grape Ribbon, Simply Scored Scoring Tool, Big Shot, Big Shot Platform, Standard Cutting Pads, Paper Snips, Bone Folder, Stampin' Trimmer, Tear & Tape, Multipurpose Glue, Dimensionals
Click on the product images below for more information and close ups for any of the supplies used in today's project. Or, go directly to my Stampin' Up! store.
Click on the product images below for more information and close ups for any of the supplies used in today's project. Or, go directly to my Stampin' Up! store.


Stay up-to-date with card ideas, by subscribing to my blog, register on my Meetup site or follow me on Instagram.
Stay up-to-date with card ideas, by subscribing to my blog, register on my Meetup site or follow me on Instagram.
To Order items used in today's project:
To Order items used in today's project:
1. Orders over $150 (not including tax and shipping), qualify for shopping rewards. You select free merchandise from the current catalogs to add to your order. You can also purchase hostess sets with a $150 order.
2. If the purchases on your Wish List are over $100, the $99 Starter Kit is one way to save on your purchase today. And save even more on future orders. You can order $125 worth of product for your $99 starter kit. After your initial $99 order for merchandise you select from anything in the current catalogs, place an order for the remainder of your Wish List as a demonstrator, and save 20% on your purchases as a demonstrator. Need help building your shopping list? Contact me, and we'll work through your starter kit order together.
3. Place an on-line order through my Stampin' Up! store - 24/7 Shopping. I would love to be your Stampin' Up! demonstrator if you don't already have one. Let me know if you need an Occasions Catalog.
.
Enjoy!
Stampin' Up! Independent Demonstrator

How does the closure work?
ReplyDeleteSheri You asked how the closure worked on this box. I just added velcro dots to the box edges to hold it closed.
Delete